

WinNMP - Nginx MariaDB Redis Php development stack for Windows
A lightweight, fast and stable server stack for developing php mysql applications on windows, based on the excellent webserver Nginx. A lighter alternative to XAMPP and WAMP.
How to enable HTTPS using free SSL Certificates from LetsEncrypt:
WinNMP includes ACME PHP, a simple CLI client for Let's Encrypt certificate authority, witch will allow you, in a few steps, to get and renew a trusted HTTPS certificate for any domain, freely and easily.
In order to install free SSL Certificates, you need average network administration skills. This document is not intended for beginners.
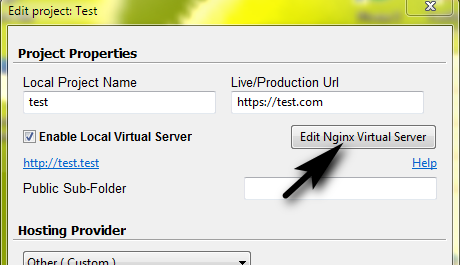
1. Create a new WinNMP Project

- Open WinNMP Manager by clicking the taskbar or desktop icon, then click on
New Projecticon, choose a project name likemyProject, hit Enter or clickSave Project. - Check
Enable Local Virtual Server
2.1. Configure your router
If the computer with WinNMP is behind a router, forward the external ports 80 and 443 to that computer.
2.2. Configure Dynamic DNS
If your hosting provider assigns you a dynamic IP Address, configure a Dynamic DNS service like changeip.com on your computer or on your router.
myDynDns.changeip.com. ---> WinNMP Server2.3. Optionally, use your own domain name
You'll need to own a domain like myDom.com. You can buy one from any Domain Name Registrars
Edit the DNS settings for your domain, usually on your Registrar's website, and choose a hostname like dev.myDom.com, and
-
if your hosting provider assigns you a static IP address, add an A record:
dev.myDom.com. IN A 12.34.56.78 dev.myDom.com. IN AAAA 3ffe:1900:4545:2:02d0:09ff:fef7:6d2c -
for Dynamic DNS service, add a CNAME record:
dev.myDom.com. IN CNAME myDynDns.changeip.com.
If you skip this step, and you only want to use your Dynamic DNS hostname, just replace below
dev.myDom.comwithmyDynDns.changeip.com
3. Allow access from LAN and Internet to your local project:
Edit WinNMP\conf\domains.d\myProject.conf directly or go to Project Setup and click on Edit Nginx Local Virtual Server Configuration File icon.
Modify like this:
server {
    listen      127.0.0.1:80;
    listen          *:80;
    listen          *:443 ssl;

    server_name     myProject.test;
    server_name     dev.mydom.com;
    server_name     myDynDns.changeip.com;

    ### Commented for now:
    ## ssl_certificate      .acmephp/master/certs/dev.mydom.com/fullchain.pem;
    ## ssl_certificate_key  .acmephp/master/private/dev.mydom.com/private.pem;

    ### Access Restrictions
    allow           all;
    ## deny         all;
Apply changes: Kill Nginx, Check Nginx Configuration Syntax, Start Nginx
Test HTTP: access in your browser http://dev.mydom.com and make sure it points to your project
4. Run ACME PHP:
Open a command prompt by clicking the corresponding WinNMP Manager icon.
Follow the instructions from the original ACME PHP Documentation, but use the command acmePhp instead of php acmephp.phar
Register your account key in Let's Encrypt - Only once !
acmePhp register myemail@example.orgGenerate an authorization token for the domain "dev.myDom.com"
acmePhp authorize dev.myDom.comPublish the authorization token in the project`s directory This step is implemented and available only on WinNMP
acmePhp publish dev.myDom.com myProjectAsk the server to check your proof
acmePhp check dev.myDom.comGet the certificate!
acmePhp request dev.myDom.comTo renew, re-run acmePhp request -q -n dev.myDom.com. For more information run
acmePhp help request5. Enable SSL Certificates:
Edit WinNMP\conf\domains.d\myProject.conf and uncomment ssl_certificate..:
    ssl_certificate         .acmephp/master/certs/dev.mydom.com/fullchain.pem;
    ssl_certificate_key     .acmephp/master/private/dev.mydom.com/private.pem;
Apply changes, then Test HTTPS: go to https://dev.mydom.com